> ## Documentation Index
> Fetch the complete documentation index at: https://www.pierview.ai/docs/llms.txt
> Use this file to discover all available pages before exploring further.
# WordPress CMS Integration
> Automatically publish AI-generated content to your WordPress site
## Overview
The WordPress integration lets you publish SEO-optimized content directly to your WordPress site, as a draft or live, straight from Pierview. Connect once, then export any generated article with a single click, or let scheduled content publish automatically.
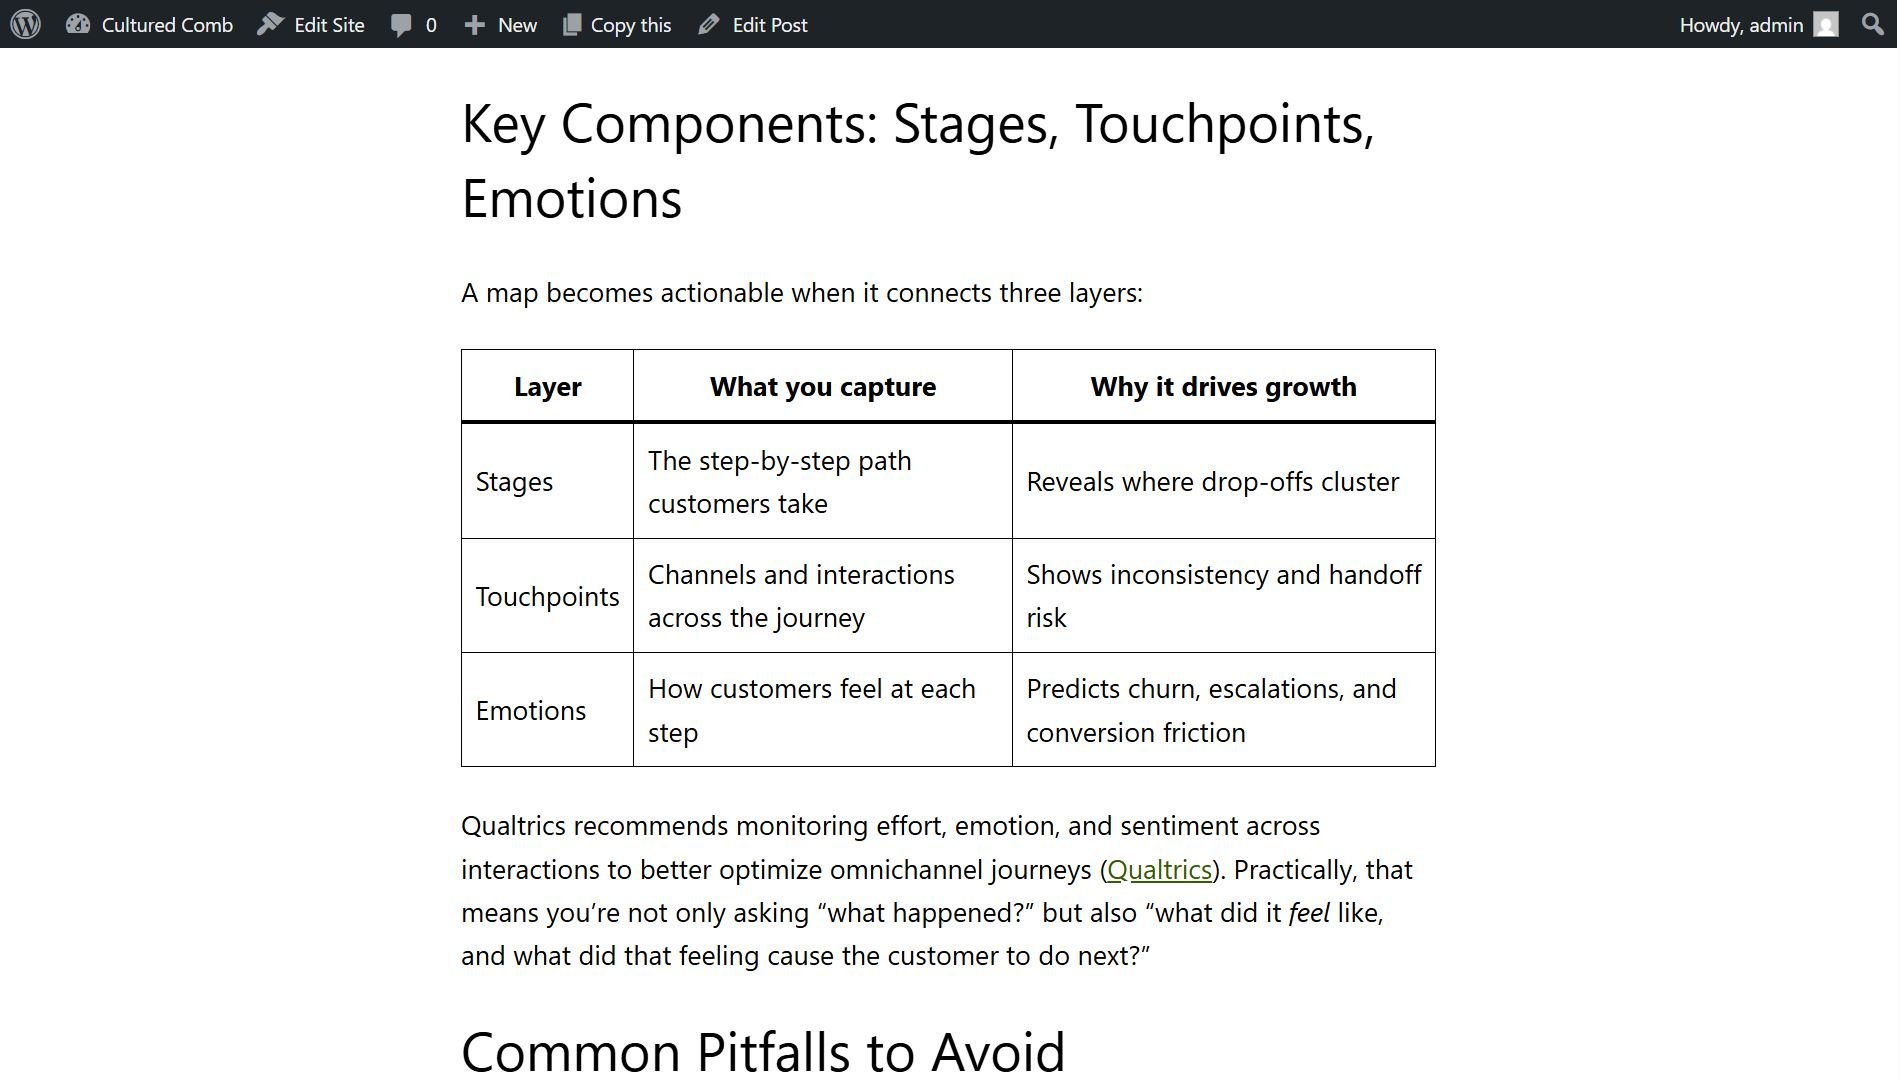
Articles are sent as native WordPress blocks, so they appear as normal, fully editable posts in your editor. **Tables, headings, lists and formatting all match your theme automatically, with no extra setup.**
This integration works with **self-hosted WordPress** (a WordPress.org site running on your own host, e.g. Hostinger, Bluehost, SiteGround, Kinsta, WP Engine) and with **WordPress.com** sites. Both authenticate using an Application Password. If you're on WordPress.com, use the username tied to your WordPress.com account (see [Step 2](#step-2-connect-pierview-to-wordpress)).
## Step 1: Create an Application Password
Pierview connects using a WordPress **Application Password**, a secure, revocable token that's separate from your normal login password.
1. Log into your WordPress admin (`/wp-admin`) as an **Administrator**, **Editor**, or **Author** (publishing live requires at least Author).
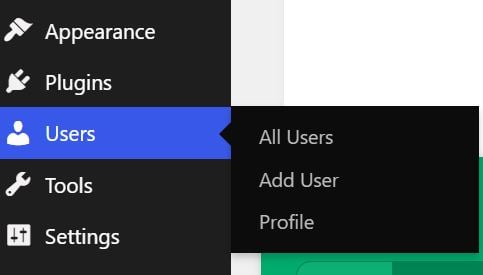
2. Go to **Users** in the left sidebar and click **Profile**.
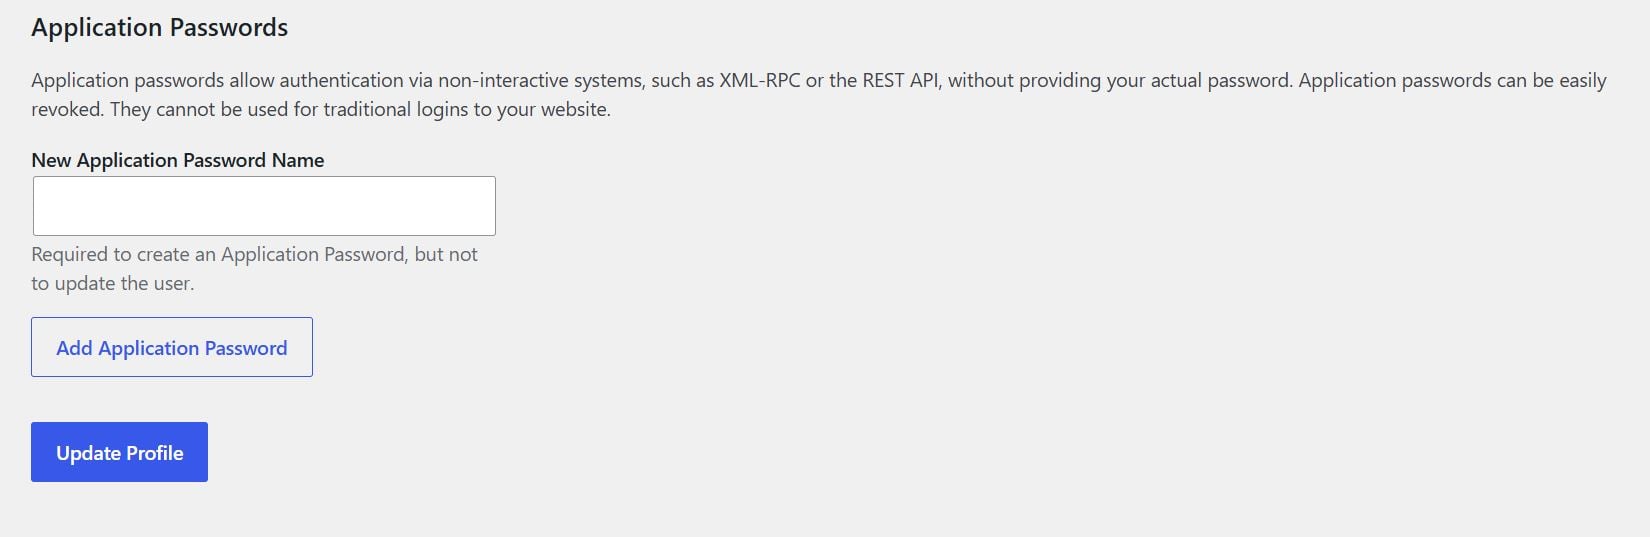
 3. Scroll down to the **Application Passwords** section.
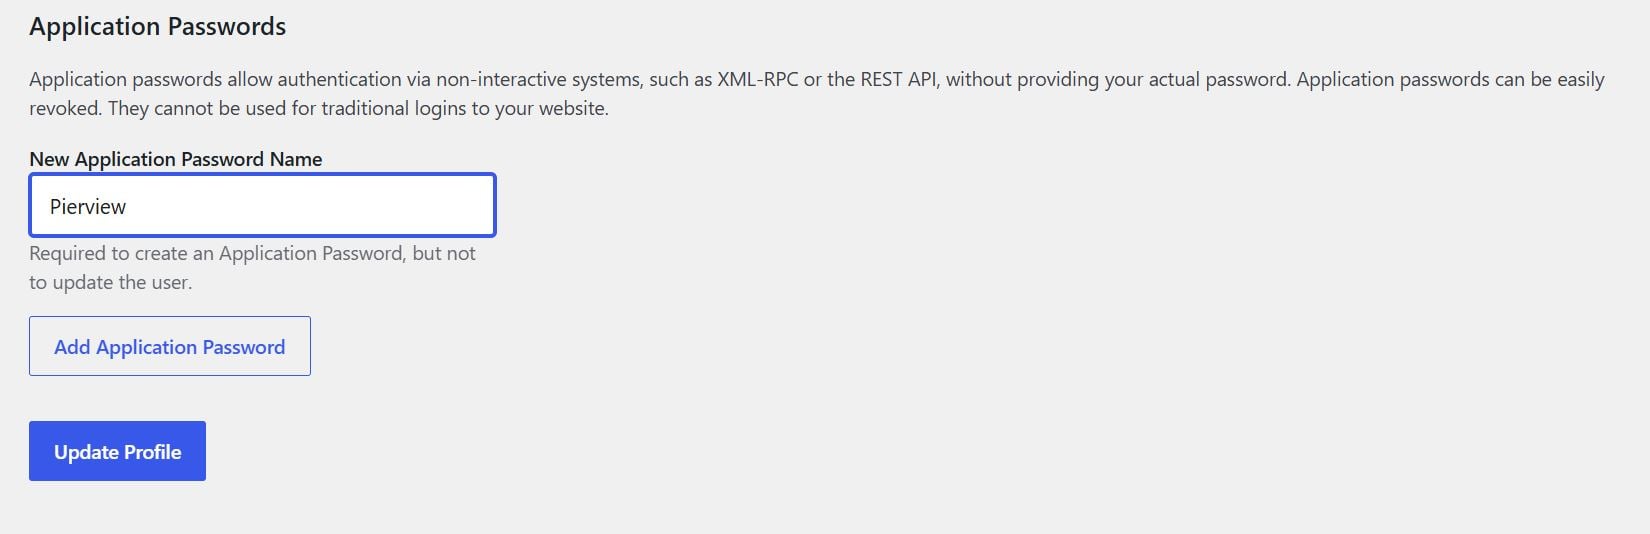
 4. Enter a name (e.g. `Pierview`) in the **New Application Password Name** field and click **Add Application Password**.
 5. WordPress shows the generated password **once**, so copy it now. The spaces in it are fine.
Your site must be served over **HTTPS** for Application Passwords to work. WordPress hides this section on non-secure sites. Keep the token handy; you'll paste it into Pierview next.
## Step 2: Connect Pierview to WordPress
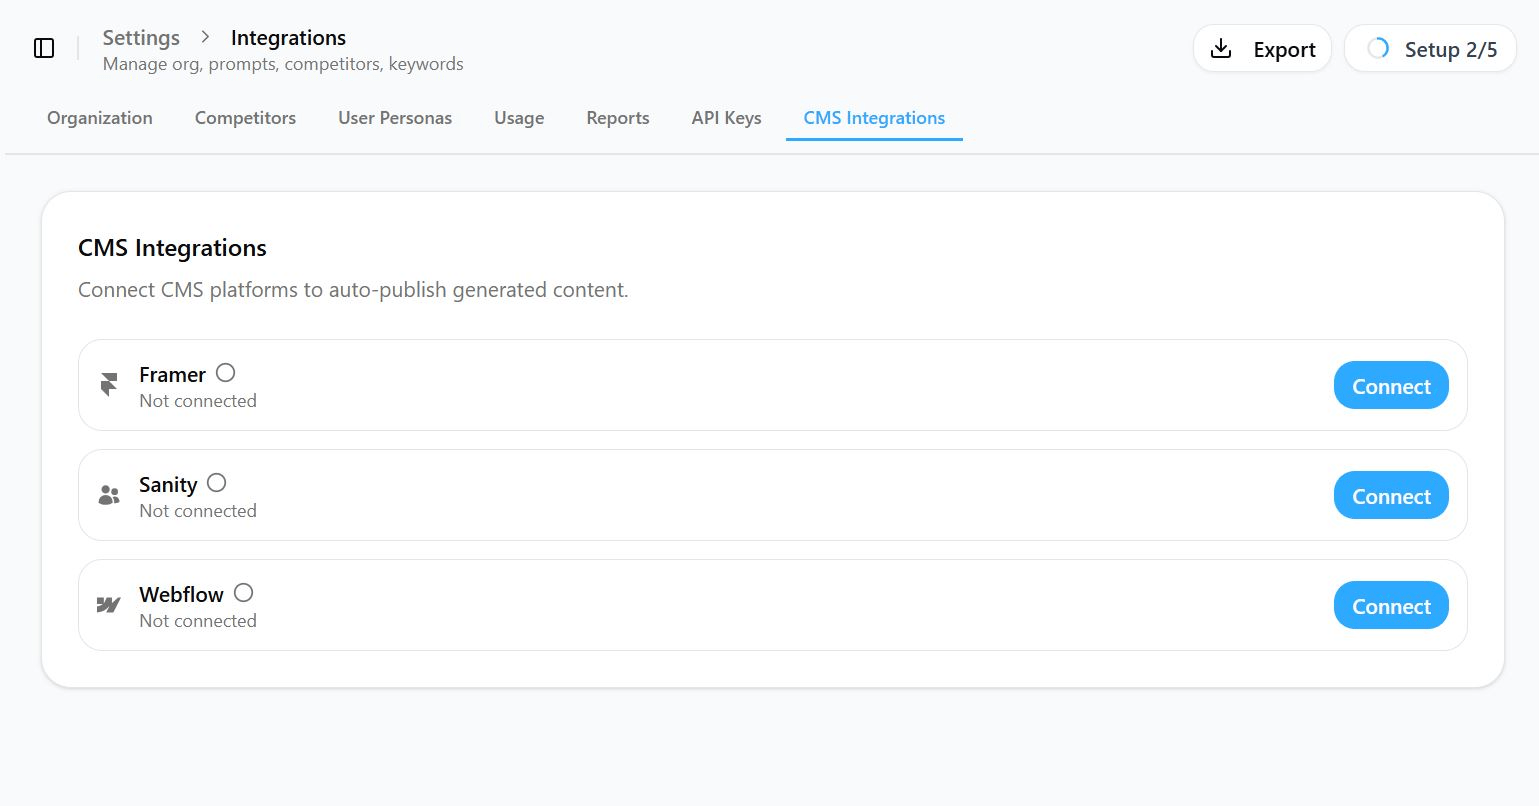
1. In Pierview, go to [Settings → Integrations → CMS Integrations](https://pierview.ai/dashboard/configuration/integrations) and click **Connect** next to WordPress.
5. WordPress shows the generated password **once**, so copy it now. The spaces in it are fine.
Your site must be served over **HTTPS** for Application Passwords to work. WordPress hides this section on non-secure sites. Keep the token handy; you'll paste it into Pierview next.
## Step 2: Connect Pierview to WordPress
1. In Pierview, go to [Settings → Integrations → CMS Integrations](https://pierview.ai/dashboard/configuration/integrations) and click **Connect** next to WordPress.
 2. Fill in:
* **Site URL**: your site's address, e.g. `https://yourblog.com` (must be HTTPS).
* **Username**: your WordPress login username. On a **WordPress.com** site, use the username tied to your WordPress.com account, which you can find at [wordpress.com/me/account](https://wordpress.com/me/account), not your display name or email.
* **Application Password**: the token from Step 1.
2. Fill in:
* **Site URL**: your site's address, e.g. `https://yourblog.com` (must be HTTPS).
* **Username**: your WordPress login username. On a **WordPress.com** site, use the username tied to your WordPress.com account, which you can find at [wordpress.com/me/account](https://wordpress.com/me/account), not your display name or email.
* **Application Password**: the token from Step 1.
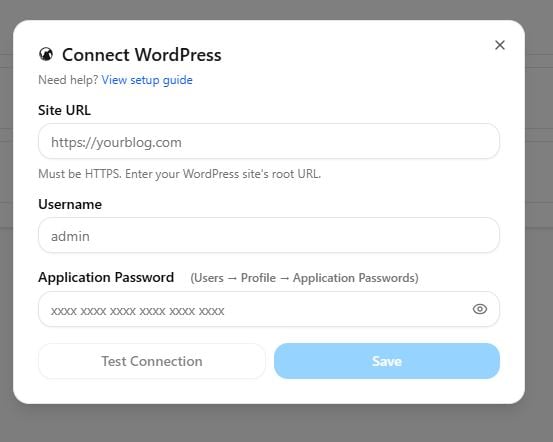 3. Click **Test connection**. A success message with your display name confirms the credentials work.
4. Click **Save**.
That's it. There are no fields to map or collections to configure. WordPress posts already have a title, content, and slug built in, so Pierview publishes straight to them.
## You're Connected!
Open any generated article and click the **Publish** tab in the top-right sidebar. You'll see your WordPress site with two options:
* **Save as Draft**: stages the post in WordPress but keeps it hidden from visitors.
* **Publish Live**: publishes the post immediately.
Re-publishing the same article **updates the existing post** — it never creates a duplicate.
3. Click **Test connection**. A success message with your display name confirms the credentials work.
4. Click **Save**.
That's it. There are no fields to map or collections to configure. WordPress posts already have a title, content, and slug built in, so Pierview publishes straight to them.
## You're Connected!
Open any generated article and click the **Publish** tab in the top-right sidebar. You'll see your WordPress site with two options:
* **Save as Draft**: stages the post in WordPress but keeps it hidden from visitors.
* **Publish Live**: publishes the post immediately.
Re-publishing the same article **updates the existing post** — it never creates a duplicate.
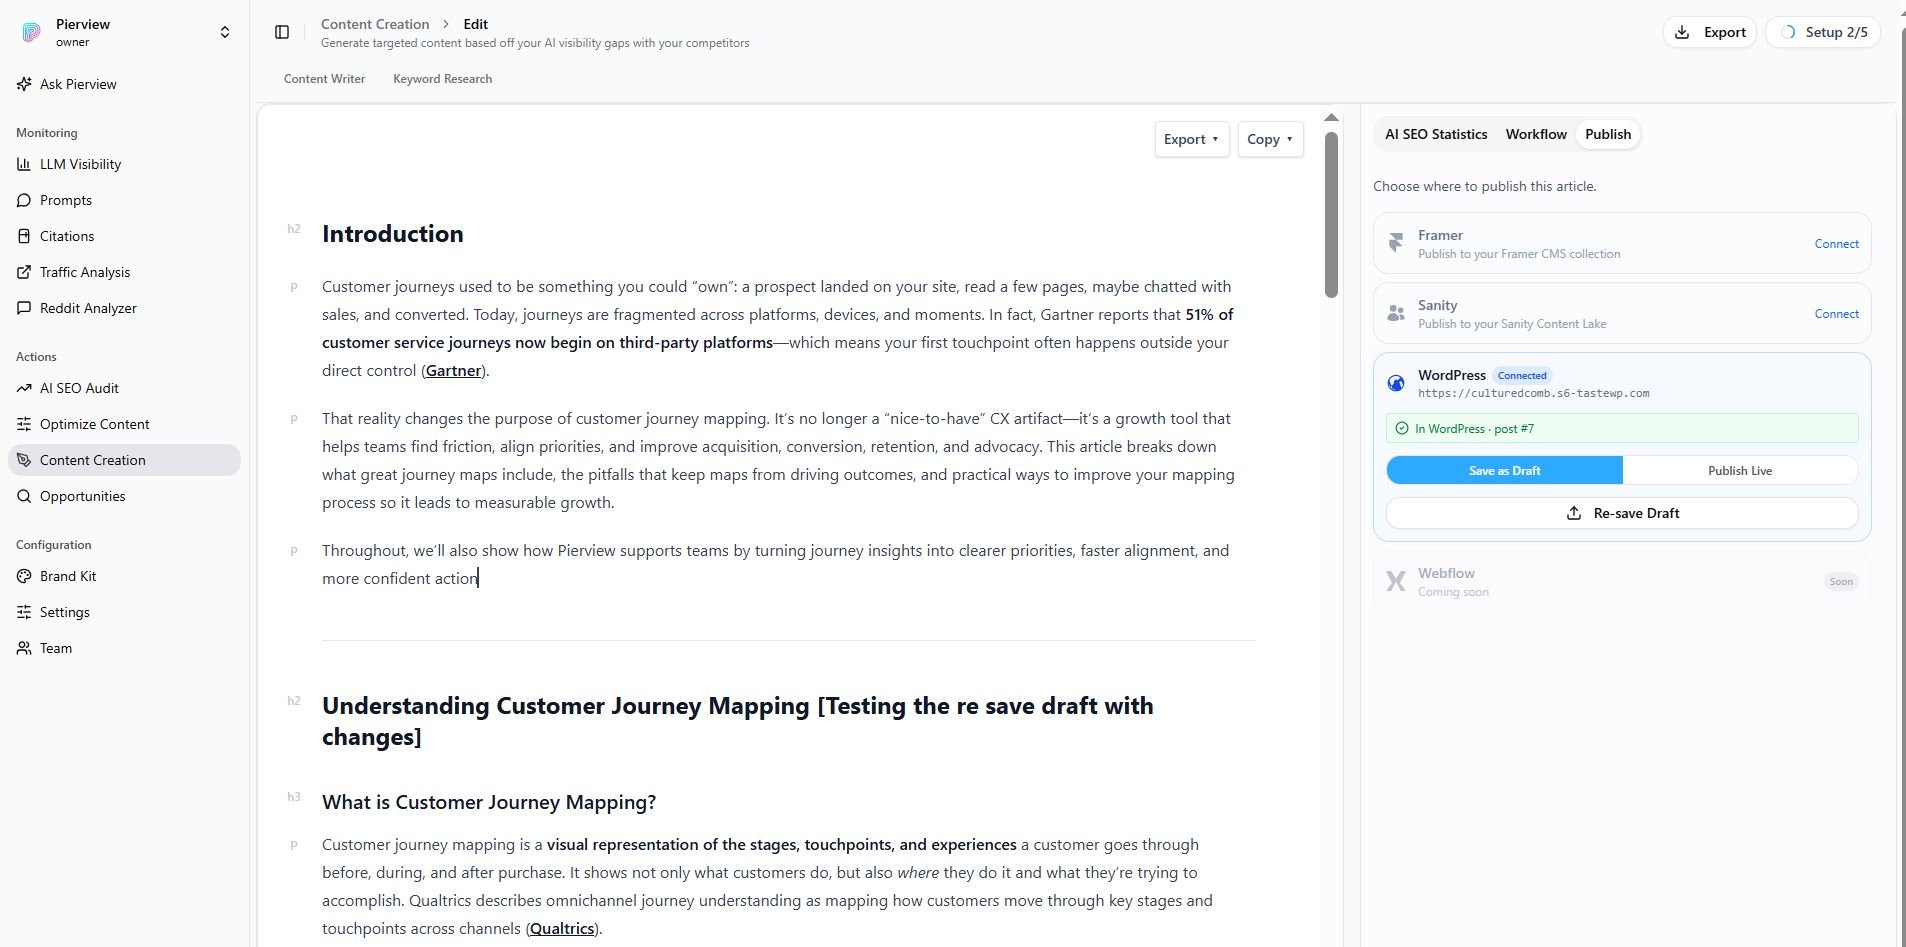 Click **Save as Draft** and you'll see a confirmation once the draft is saved:
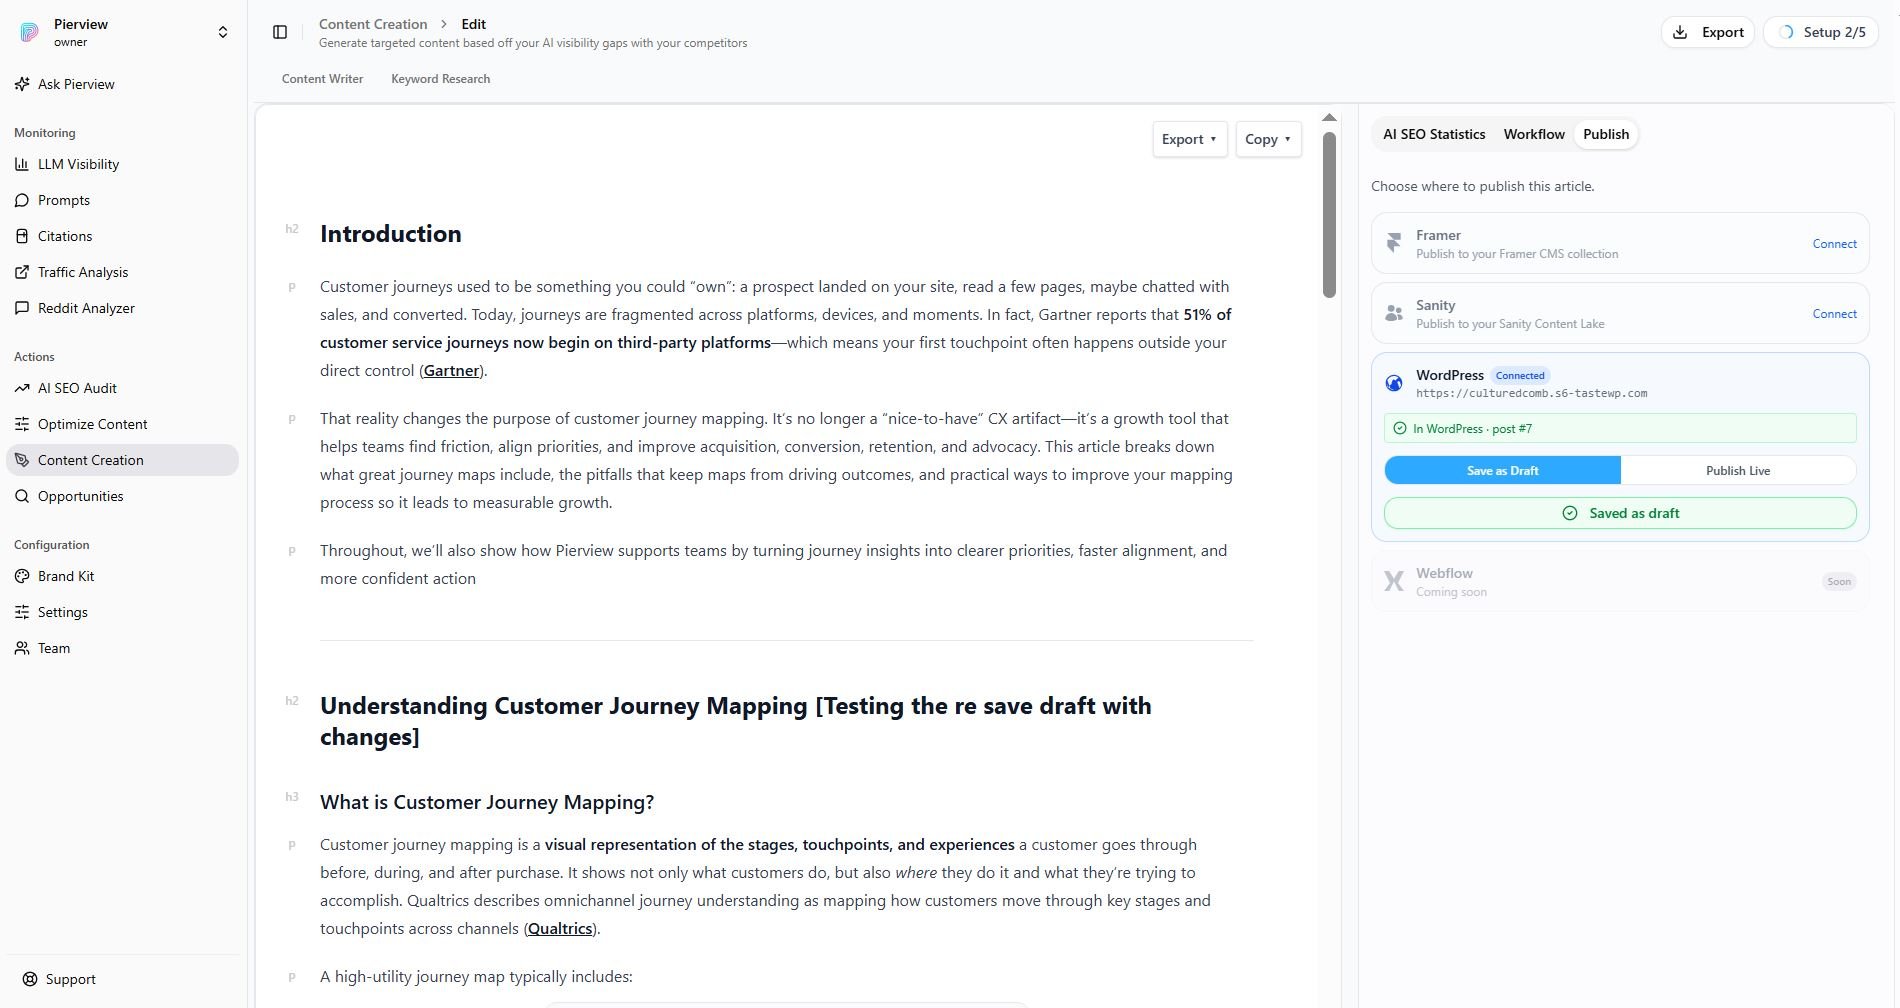 Click **Publish Live** to push it public immediately:
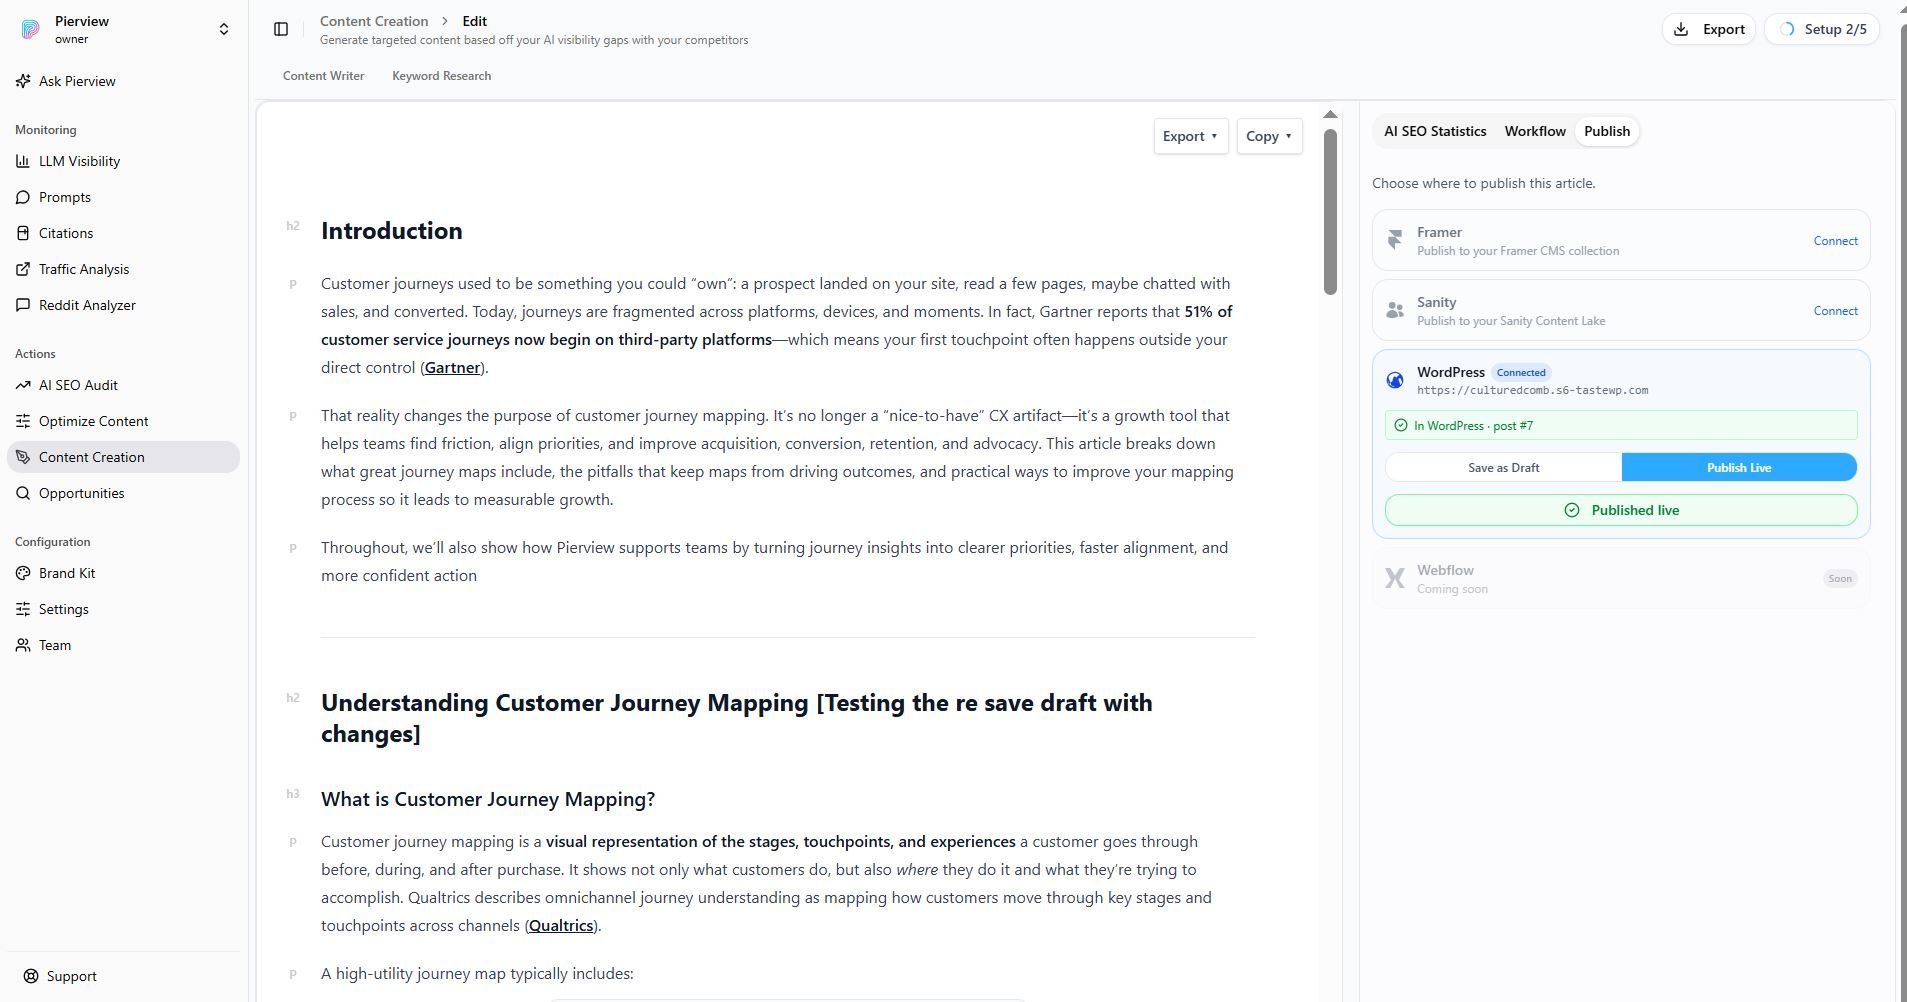 And here's how it looks on your site — formatting, headings, and tables all render to match your theme automatically:
 Content scheduled for automatic generation will also publish to WordPress automatically (as a live post) once each article finishes generating, with no manual step needed.
## Troubleshooting
A few things to check:
* Confirm the **username** and **application password** are correct (use the application password, not your login password).
* Make sure the site is served over **HTTPS**.
* Some hosts (Apache with CGI/FastCGI) strip the `Authorization` header before WordPress sees it. If you're on shared hosting and credentials are definitely correct, ask your host to allow the Authorization header, or add this line to your `.htaccess`:
```apache theme={null}
SetEnvIf Authorization "(.*)" HTTP_AUTHORIZATION=$1
```
Your WordPress user needs permission to publish. Use an **Author**, **Editor**, or **Administrator** account. Subscribers and Contributors can't publish posts.
Pierview publishes through WordPress's built-in REST API (`/wp-json`). If it's reported as missing:
* Double-check the **Site URL** (it should be your site's root, e.g. `https://yourblog.com`).
* A **security plugin** (e.g. Wordfence, Solid Security) or firewall may be disabling the REST API or Application Passwords. Re-enable them, or allow the `/wp-json/wp/v2/` routes.
WordPress.com also supports Application Passwords, so the integration works there too. The most common cause of a failed connection is the wrong **username**: WordPress.com uses the username tied to your account, which is often different from your display name or email. Find it at [wordpress.com/me/account](https://wordpress.com/me/account) and use that exact value in the **Username** field.
Published tables automatically inherit your **theme's** styling, so they match the rest of your site. If your theme styles tables minimally and you'd like to customise them, add CSS via **Editor → Styles → ⋮ (three-dot menu) → Additional CSS**, not in the post itself, since WordPress strips inline `
Content scheduled for automatic generation will also publish to WordPress automatically (as a live post) once each article finishes generating, with no manual step needed.
## Troubleshooting
A few things to check:
* Confirm the **username** and **application password** are correct (use the application password, not your login password).
* Make sure the site is served over **HTTPS**.
* Some hosts (Apache with CGI/FastCGI) strip the `Authorization` header before WordPress sees it. If you're on shared hosting and credentials are definitely correct, ask your host to allow the Authorization header, or add this line to your `.htaccess`:
```apache theme={null}
SetEnvIf Authorization "(.*)" HTTP_AUTHORIZATION=$1
```
Your WordPress user needs permission to publish. Use an **Author**, **Editor**, or **Administrator** account. Subscribers and Contributors can't publish posts.
Pierview publishes through WordPress's built-in REST API (`/wp-json`). If it's reported as missing:
* Double-check the **Site URL** (it should be your site's root, e.g. `https://yourblog.com`).
* A **security plugin** (e.g. Wordfence, Solid Security) or firewall may be disabling the REST API or Application Passwords. Re-enable them, or allow the `/wp-json/wp/v2/` routes.
WordPress.com also supports Application Passwords, so the integration works there too. The most common cause of a failed connection is the wrong **username**: WordPress.com uses the username tied to your account, which is often different from your display name or email. Find it at [wordpress.com/me/account](https://wordpress.com/me/account) and use that exact value in the **Username** field.
Published tables automatically inherit your **theme's** styling, so they match the rest of your site. If your theme styles tables minimally and you'd like to customise them, add CSS via **Editor → Styles → ⋮ (three-dot menu) → Additional CSS**, not in the post itself, since WordPress strips inline `